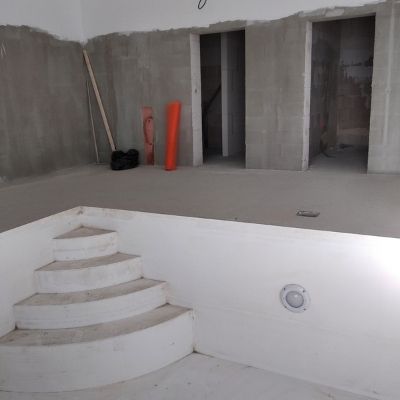
The renovation process starts with an on-site visit
A pool renovation is not a one-size-fits-all job. Before any work begins, a crew comes to your home to inspect the existing surface, check the tile and coping, and evaluate the overall condition of the shell. They will look for cracks, delamination, and signs of water loss. This on-site assessment is the only way to give an accurate estimate because every pool has different wear patterns and access challenges.
During this visit, you will discuss what you want to change: a new finish, updated tile, or repaired coping. The crew will measure the pool, note the location of equipment, and plan how they will set up their work area. They will also talk about the timeline, which depends on the size of the pool, the type of finish you choose, and the weather. Once you agree on the scope, they schedule a start date and order the materials.
Draining, cleaning, and surface preparation
On the first day of work, the crew drains the pool using submersible pumps. They handle the water carefully, routing it to a safe drainage area away from your foundation and landscaping. Once the pool is empty, they power-wash the walls and floor to remove algae, scale, and loose debris. This step reveals the true condition of the old surface and helps them plan how much material needs to be removed.
Next comes the heavy work: chipping off the old finish. Using chipping hammers and hand tools, the crew removes the worn plaster, pebble, or quartz down to the bare gunite or shotcrete shell. They pay special attention to the waterline, steps, and corners where the old finish tends to be thickest. After chipping, they grind down any rough spots and clean the shell again to ensure the new finish bonds properly. This stage is dusty and loud, but it is the foundation of a long-lasting result.
Tile and coping repairs come next
If your renovation includes new tile, the crew removes the old waterline tile and any damaged coping stones. They carefully chip out the old mortar and clean the bond beam so the new tile sits flush. For coping repair, they replace cracked or spalled stones with matching material, then set everything in a fresh mortar bed. The crew takes care to keep the tile line straight and level, since it is the most visible part of the finished pool.
Tile and coping work is done before the new surface is applied because the finish needs to overlap the tile slightly. The crew will also check the skimmer throats, returns, and light niches for any cracks or leaks. If they find issues, they repair them with hydraulic cement or epoxy before moving on. This is the time to upgrade to a different tile color or style, since the old tile is already removed.
Applying the new finish and filling the pool
With the shell prepped and tile set, the crew mixes and applies the new finish. For plaster, they trowel it on by hand, working in sections to keep a consistent texture. For pebble or quartz, they spray the material onto the walls and floor, then trowel it smooth. The crew works quickly because the material begins to set within an hour. They finish by washing the surface to expose the aggregate and brushing it to remove excess cream.
After the finish is applied, the pool is filled with water immediately. The crew starts the fill using a hose, and they often add a start-up chemical treatment to balance the water from the beginning. Filling a typical residential pool takes 12 to 24 hours. Once full, the crew runs the pump and filter to circulate the water, and they show you the post-fill care routine, including brushing and chemical adjustments. The crew cleans up all debris and equipment before they leave.
What you need to do after the crew leaves
For the first few weeks, your new finish needs special care. You will brush the walls and floor daily with a soft brush to help the surface cure evenly and to remove any loose dust. The water chemistry must be kept within a specific range: pH between 7.2 and 7.6, alkalinity between 80 and 120 ppm, and calcium hardness between 200 and 400 ppm. Your crew will give you a written schedule for these adjustments.
Avoid using a pool vacuum or automatic cleaner for the first 30 days, and do not let anyone swim until the water is clear and the chemistry is stable. The crew will return for a follow-up visit to check the finish and make sure the water is balanced. By following the start-up instructions, you help the new surface last as long as possible. If you have questions during the curing period, call the crew who did the work — they know your pool and can guide you through the process.